How to Configure Apache Virtual Host

If you are learning web development, installing a local webserver is mandatory. In my case, installing and configuring apache2 is one of the most enlightening and infuriating process to undertake. What I usually do after installing apache is to create a directory where I just throw all my projects and be the default directory for apache.
After installing apache2, create a directory somewhere, say ~/www and create an index.html file (or php if installed).
Go to the apache directory, /etc/apache2;
Go to sites-available folder and copy the default site configuration, rename it to whatever you want.
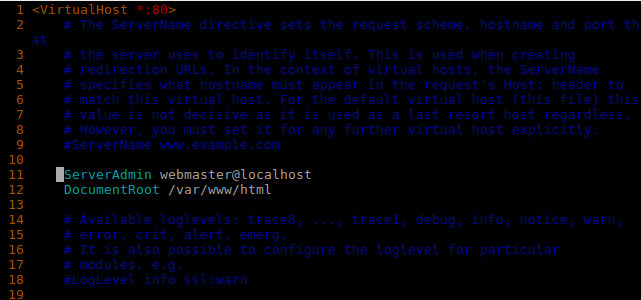
Open the new site configuration with a text editor, (I use vim) and edit the following lines:

No trailing forward slash (' / ')!
Change DocumentRoot to the directory you created prior, say /home/xyz/www, save and exit the editor.
Go back to /etc/apache2 and create a back-up file of apache2.conf.
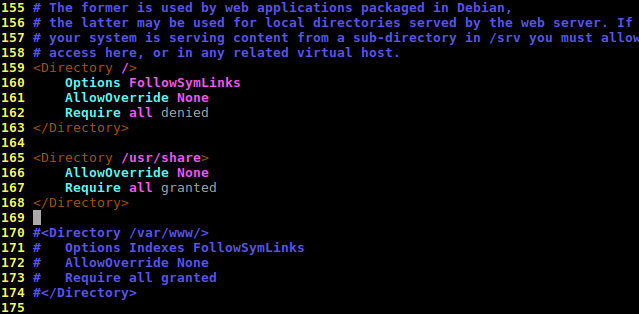
Open apache2.conf with a text editor and scroll down until you see the following lines:

Use '#' to comment out lines
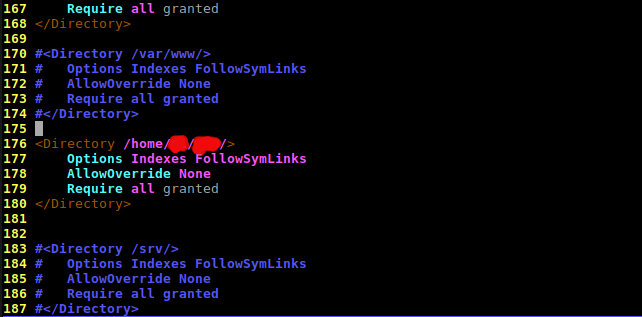
Copy the lines of code from 170 to 174 as shown in the image and comment out the same, by inserting a # before each line.
Now, paste the copied code and edit the directory /var/www/ to your custom directory, /home/xyz/www/. Save and exit editor.

Observe trailing forward slash (' / ')!
Enable your virtual hostfile, open a terminal and enter the command:
a2ensite sitename.conf
Disable the default site, you know the drill:
a2dissite 000-default.conf
Restart apache server:
service apache2 restart
That is it, now open your browser and go to localhost or 127.0.0.1, you should see the contents of the index file you created earlier.
Now, you can slap your projects on the directory you created and apache will serve them by accessing the url:
localhost/yourprojectfolderthathasanindexfile
you can also use 127.0.0.1 instead of localhost on the url.
